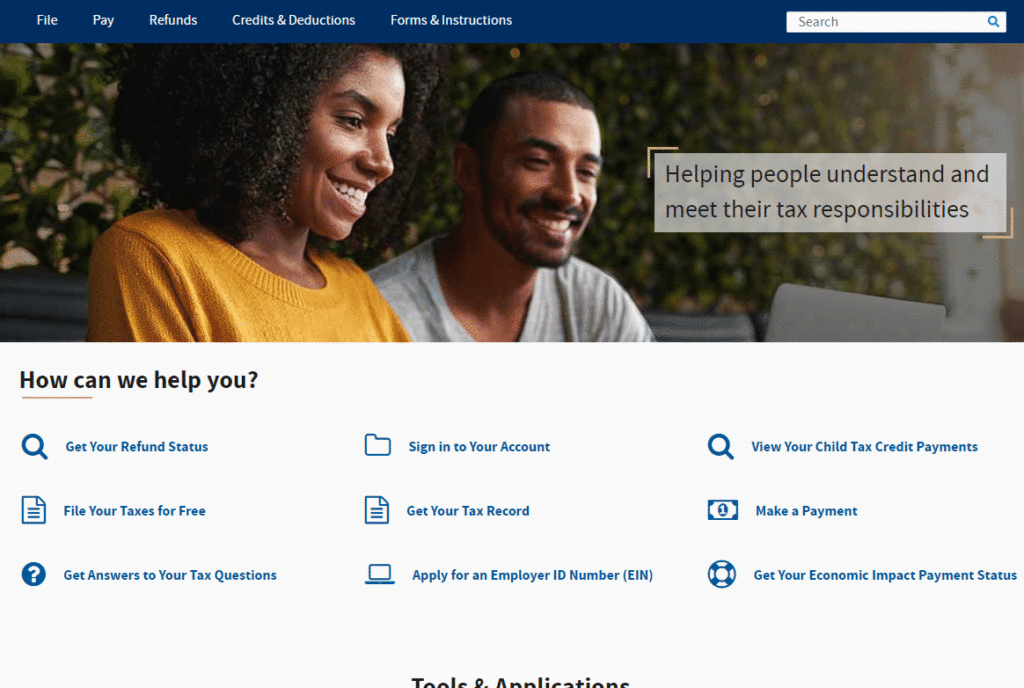
Every taxpayer needs to follow these steps. For example, even if you file your tax return jointly with a spouse, you each have your own social security number so you each have your own tax account with the IRS. Both spouses will need to follow these steps to access their tax accounts with the IRS.
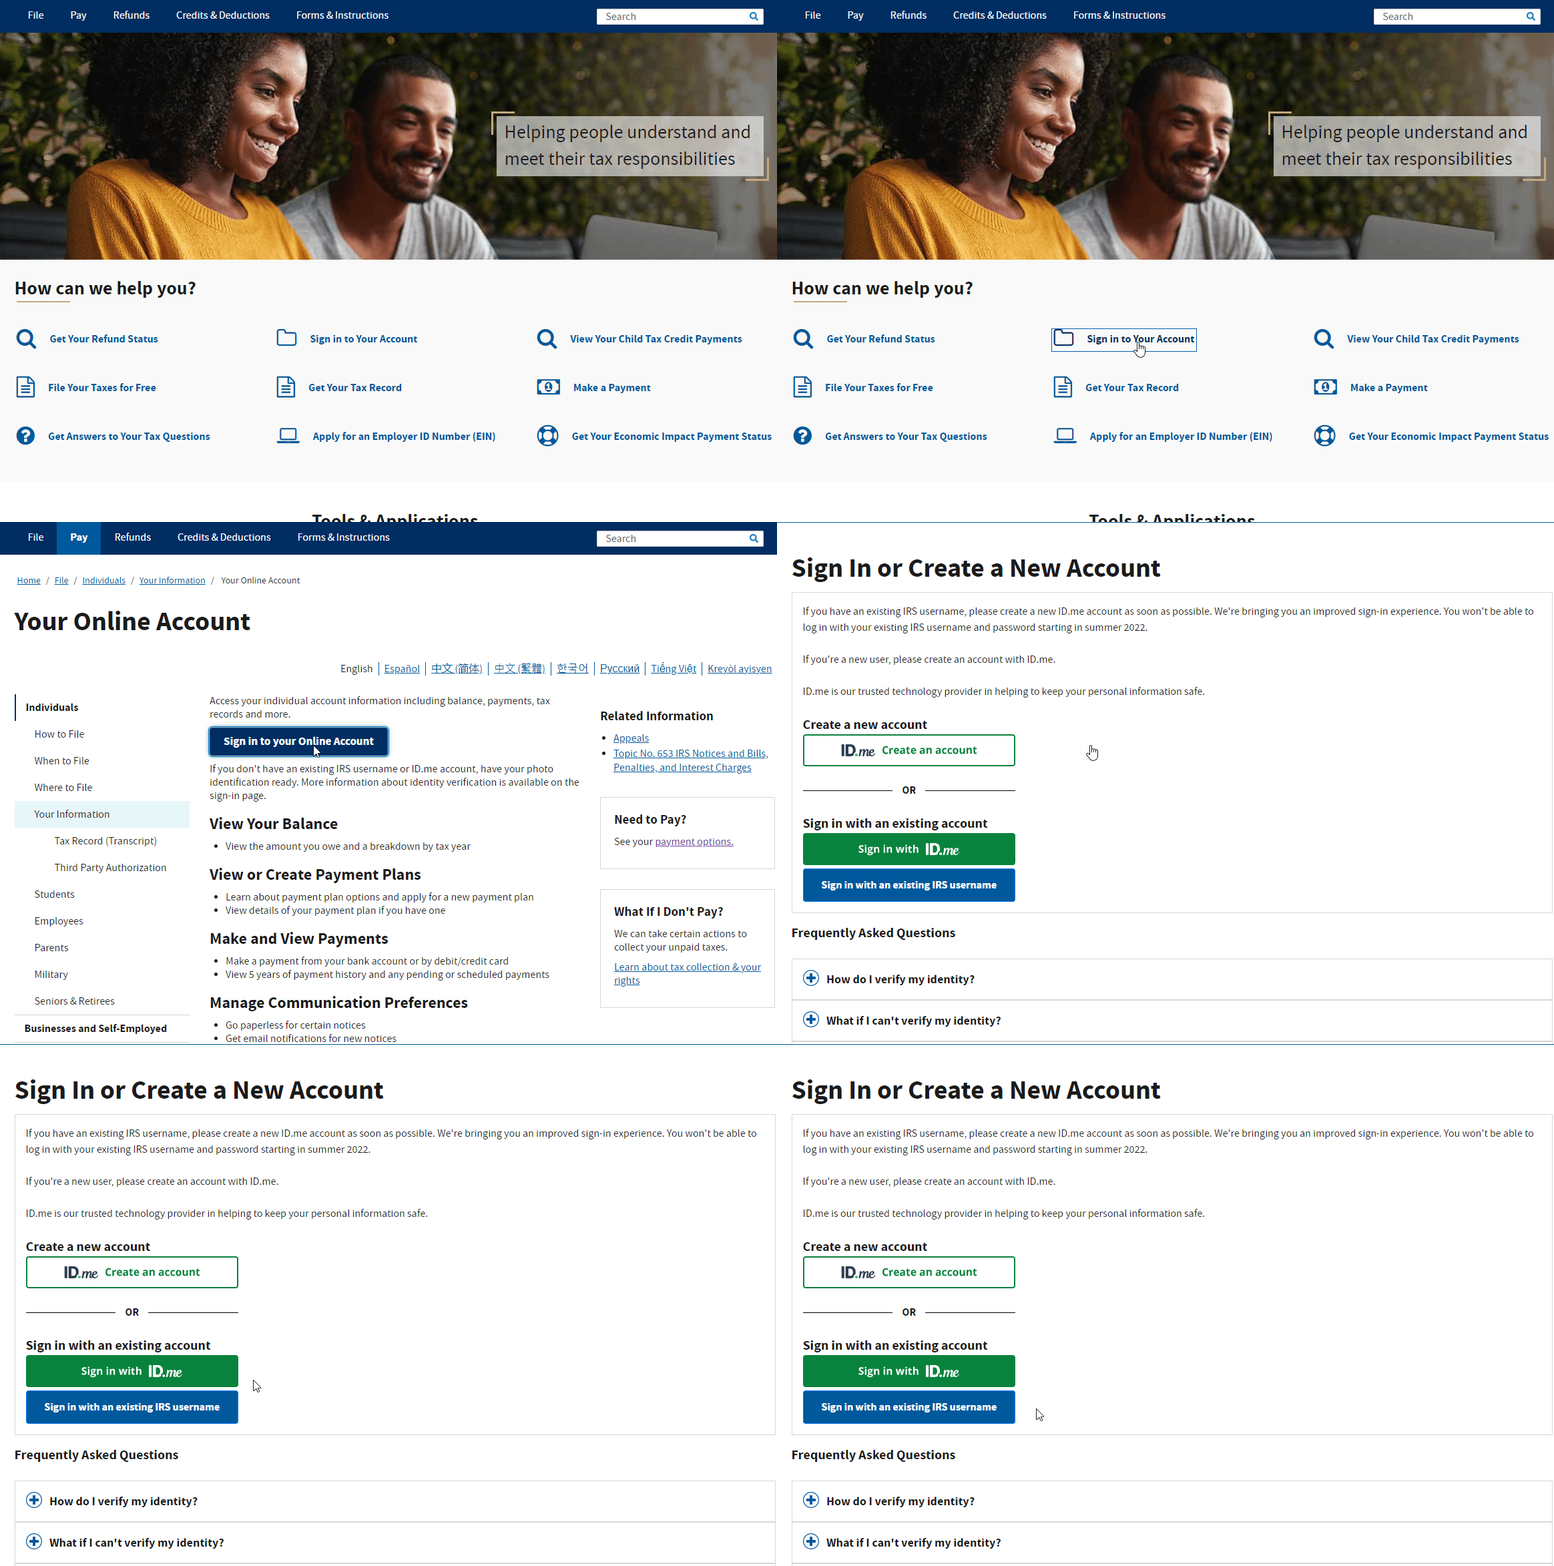
The first step is to navigate to IRS.gov. In the middle of the website will be a link to “Sign in to Your Account” – click that and then click the blue button that says the same thing. Ok, now you have three options here. You can either “Create a new account using ID.me,” you can “Sign in to the IRS website using an existing ID.me login,” or you can “Sign in with an existing IRS.gov login.”
Let’s start with the last option first. Three years ago, I set up an account on IRS.gov. They required you to create a username and password, confirm some identifying information, answer some questions and then I had access to my account.
Well, since identity theft is making identification verification harder for everyone, the IRS contracted a company called ID.me, whose only job is to verify the identity of your online logins. So for those of us that have old IRS.gov logins, we all have to switch to a new ID.me login before the summer of 2022. So even if you can get into your IRS.gov account using this blue button, you won’t be able to for much longer, and you’ll eventually have to follow these steps to verify who you are through ID.me.
If you are lucky enough to have a login for ID.me already, you don’t need to create a new one because you’ve already proven who you are, so you can use that same login. My wife already has an ID.me account because of something she had to do last year when she was attending grad school, so she can just log in right to IRS.gov with that account. But first, she has to follow the same button as me and pretend she doesn’t have an ID.me account because her account isn’t linked up with the IRS.gov website yet. So only login via this button once you have your ID.me account linked up with the IRS. So if this is your first time setting up an ID.me account, or you have one that isn’t yet linked to the IRS, we’ll choose the first link and set up a new account.
If you already have an ID.me account, you can click “Sign In To ID.me” to connect your account to IRS.gov. And once you do that, you’re done. But for those who need to create a brand new account, listen up.
Before we continue, I’m going to tell you what you need to make this process go smoothly. If you don’t have these things available right now, don’t even try to start this process. It’s sure to end in frustration and anger, I’ve already heard it from so many clients, but it should take no more than 10 minutes in total if you prepare for this.
You need to be able to access IRS.gov on your computer or laptop; you need to also access your email account on that same computer, both windows open at once. And you also need your cell phone and your driver’s license or ID. I need you to have all of those things gathered BEFORE you start this process.
Now once you have everything together. Continue to set up your account on ID.me.
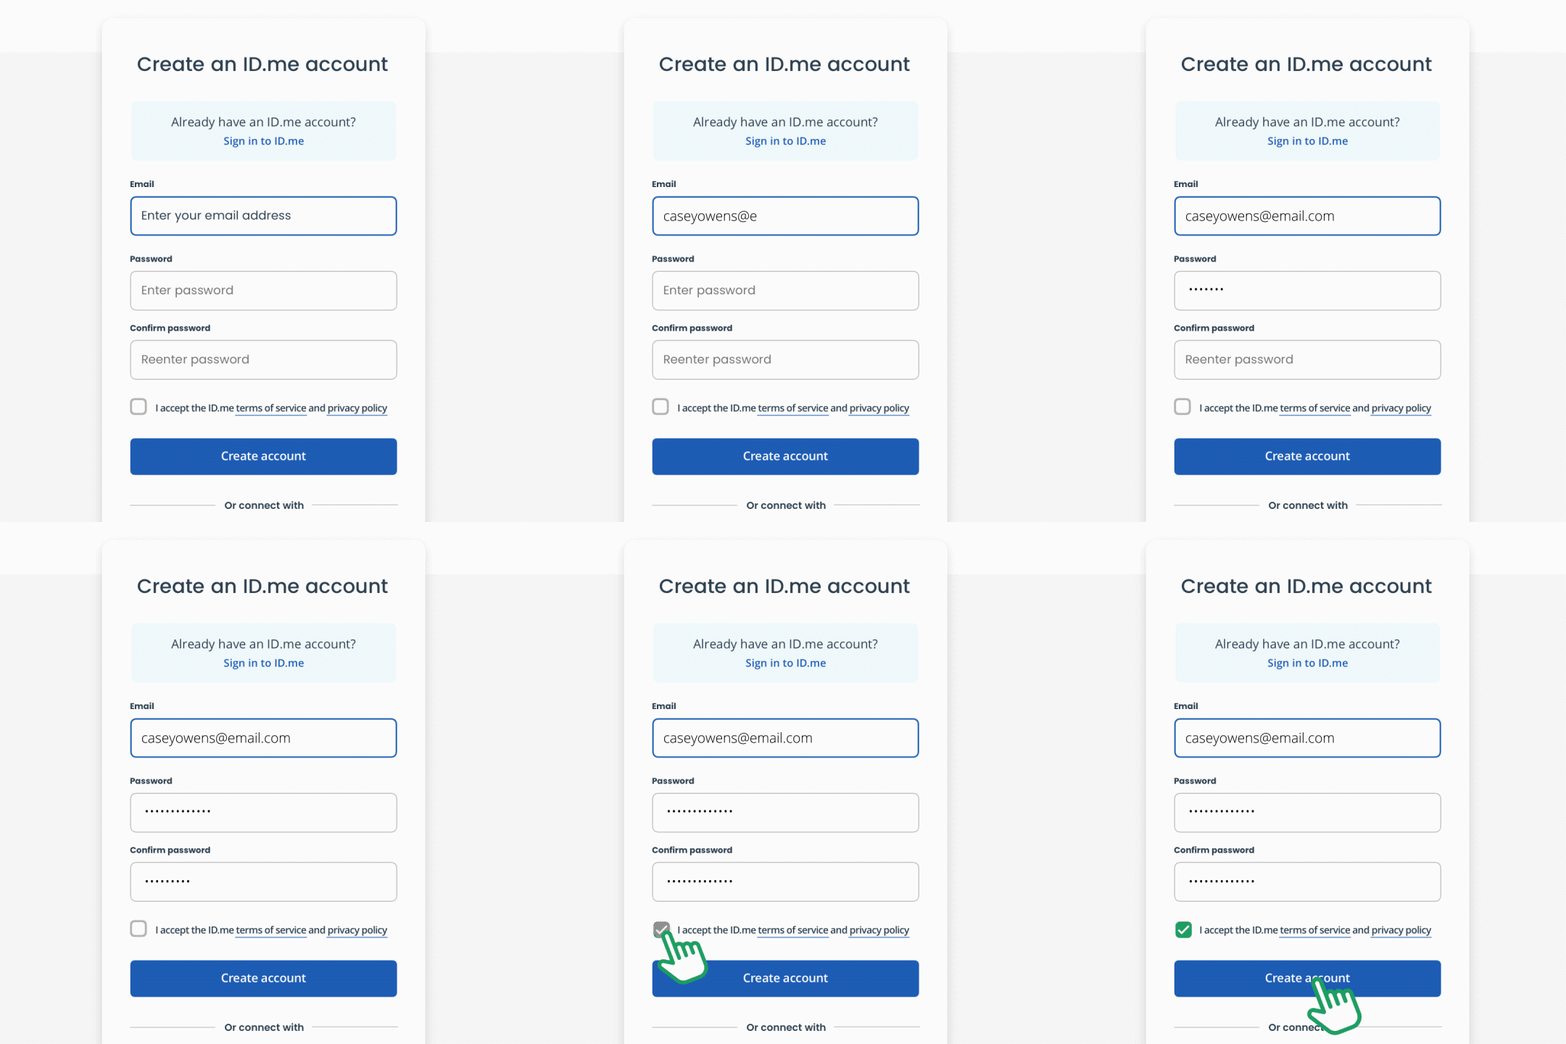
Step #1 – Enter an email address that you can access and choose a strong password.
You’ll enter your email address and password. This email address should be the one you have access to on your other browser window. And the password needs to be the most secure password you’ve ever made in your life. If you don’t have a password manager, this needs to be the first password you generate and store because this password verifies your identity. It’s so important to take this seriously. Once you set up your secure password, you can click Create Account.
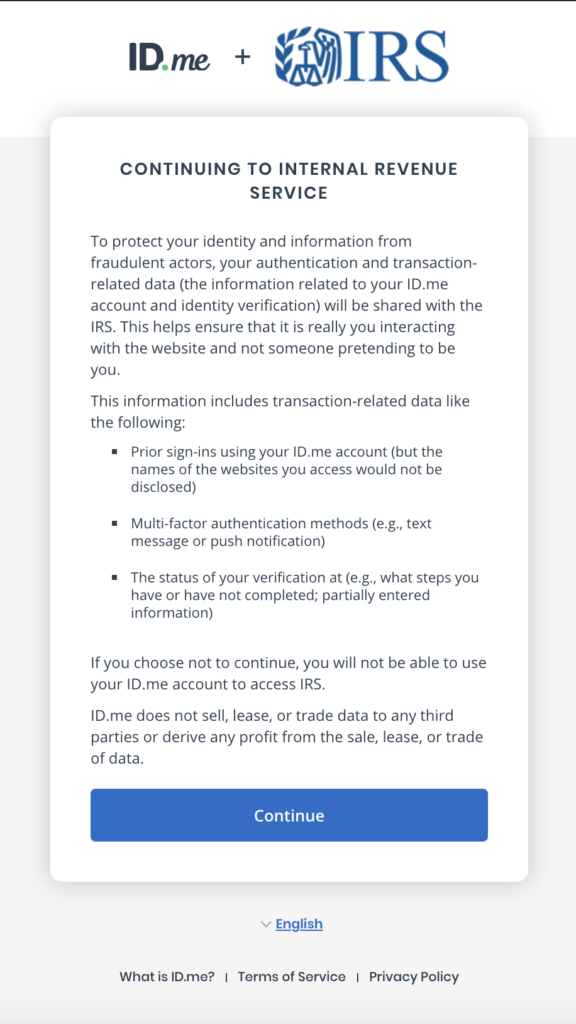
Step #2 – Allow the ID.me to connect with the IRS
You’ll be asked to allow the ID.me account to access the IRS. And then, an email will be sent to your email address to confirm the login attempt and verify that you can access the email address you provided.
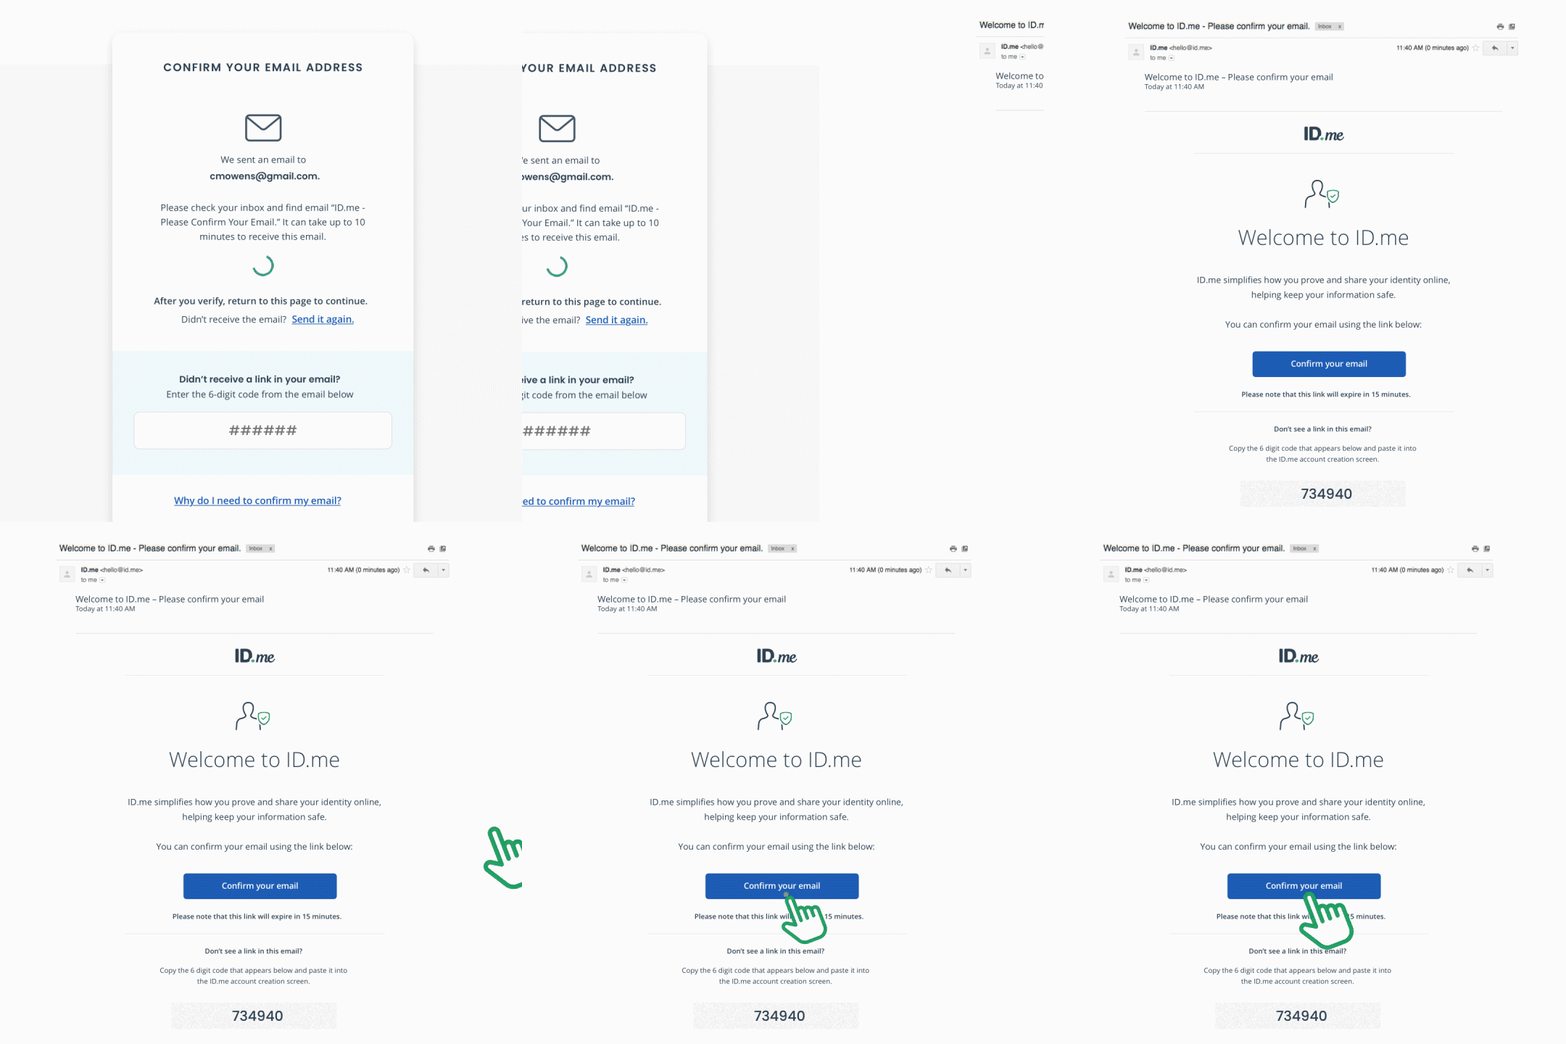
Step #3 – Confirm Your Email Address
So head on over to your email account, open up the email that just came in, and click the Confirm Your Email button. Now you can head back over to the ID.me window. It should recognize that you clicked the button and take you to the next step.
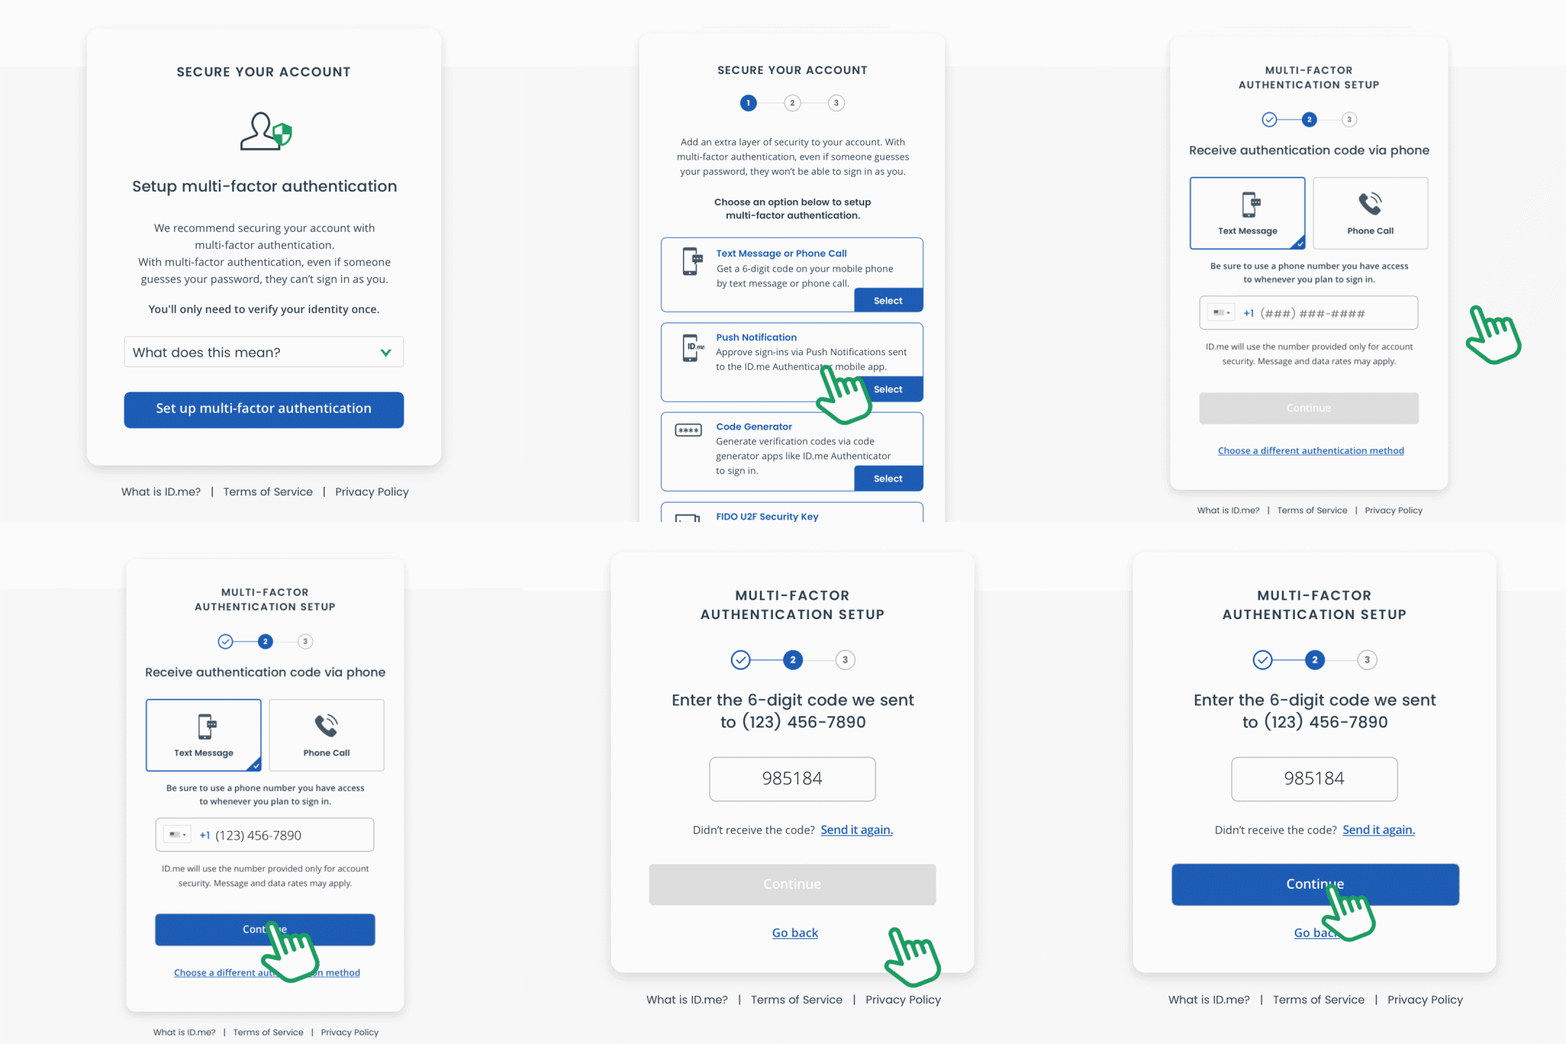
Step #4 – Multi-factor Authentication
Not only will you have a rock-solid password, but you’ll also have a secondary verification on your account. I chose a text to my cell phone; I think that’s the easiest, but if you’d rather use a phone call, a push notification, or a code generator, by all means.
Once I input my phone number, I get a text with a code. I input that code into the ID.me website, confirming that I control my account’s second layer of authentication.
So far pretty easy right? Standard account setup stuff. Next is this real identification verification.
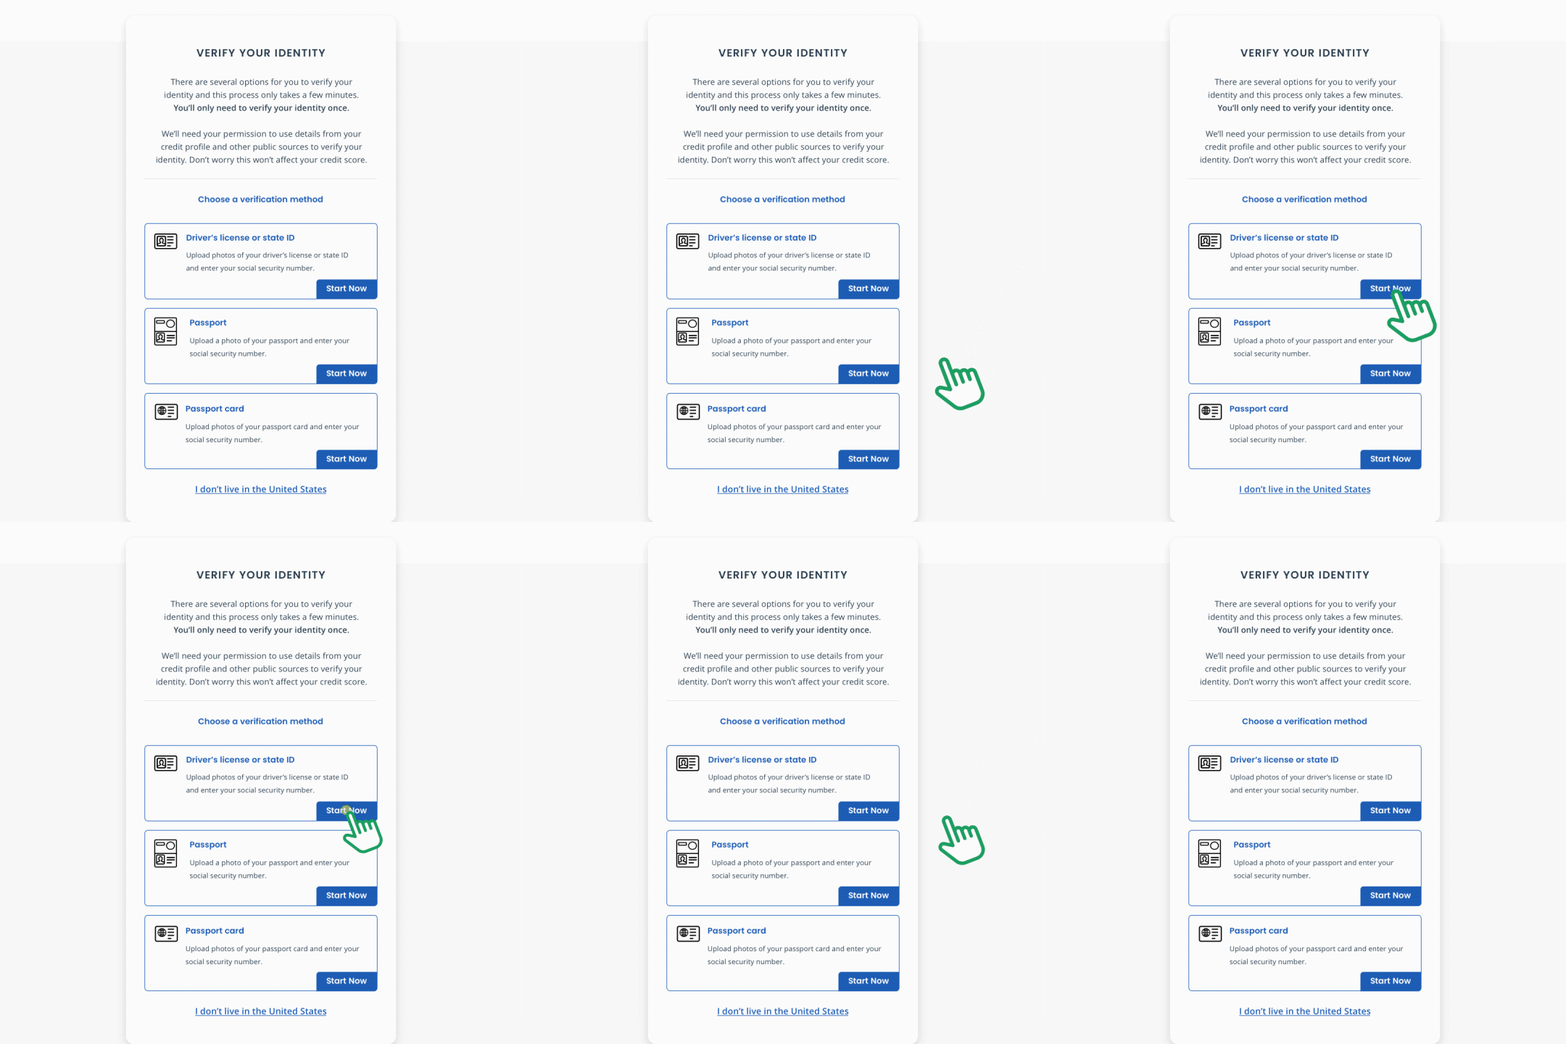
Step #5 – Drivers License Verification
They want to see your driver’s license or state ID. Click that link on the ID.me website telling them that you want to upload a picture of your license. The easiest way to do that is by taking a picture with your cell phone. Input your phone number again, and they’ll text you a link to complete the upload of your driver’s license on your phone.
You’ll have to take a picture of the front and back sides. It’s very similar to making a mobile check deposit.
After submitting your photo identification, we’re going to stay on the phone because they want to make sure someone didn’t just steal your ID.

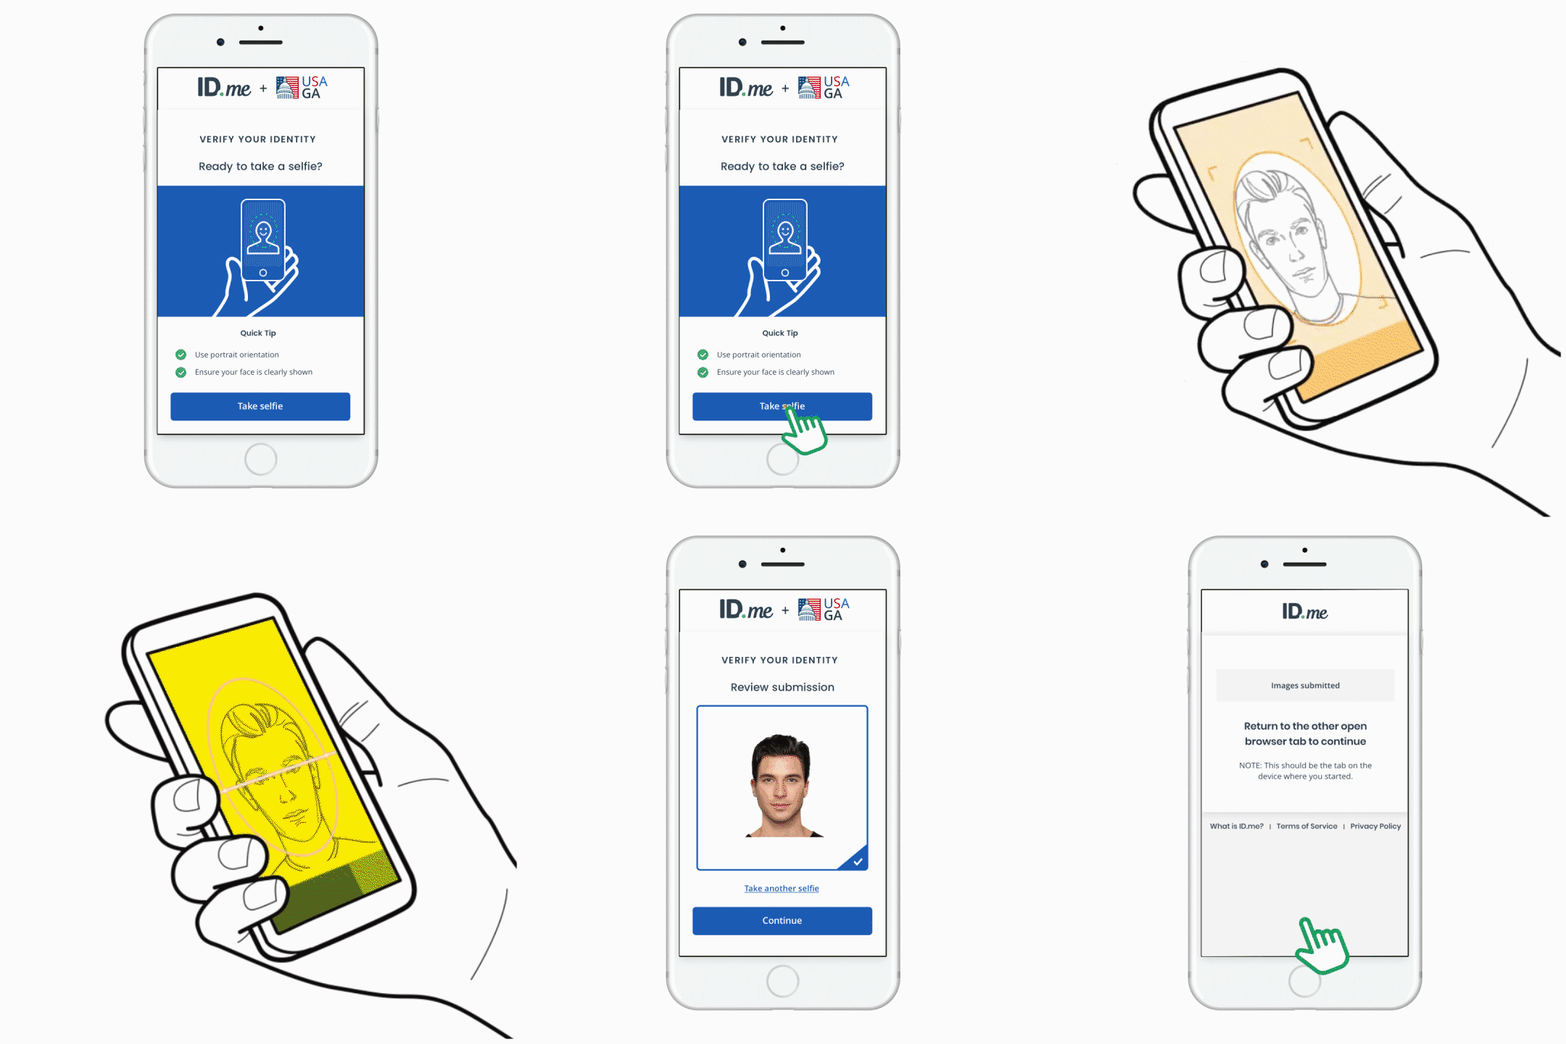
Step #6 – Selfie Time!
They want a video selfie. You’ll put your face super close to the camera, the screen will flash a few colors and then that’s it! It will tell you that you ID has been verified and that you can head back over the to the computer to finish the sign in process.
Step #7 – Enter in your social security number
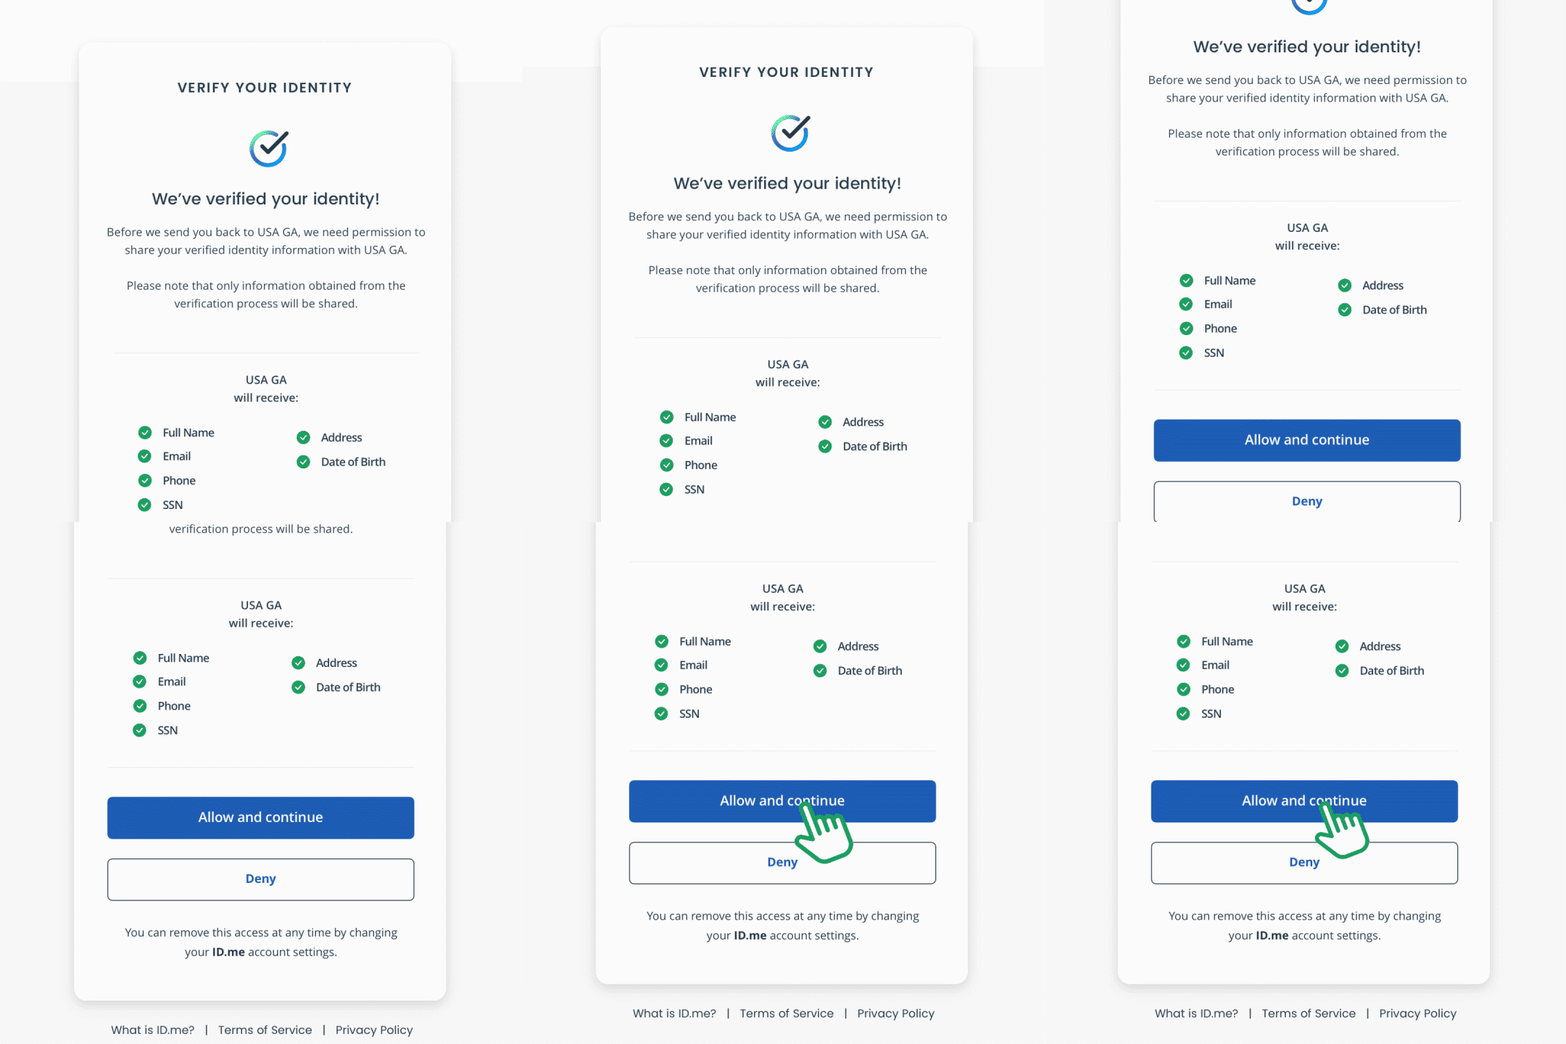
Enter your social security number and review all of the information that has come up about you and your life.
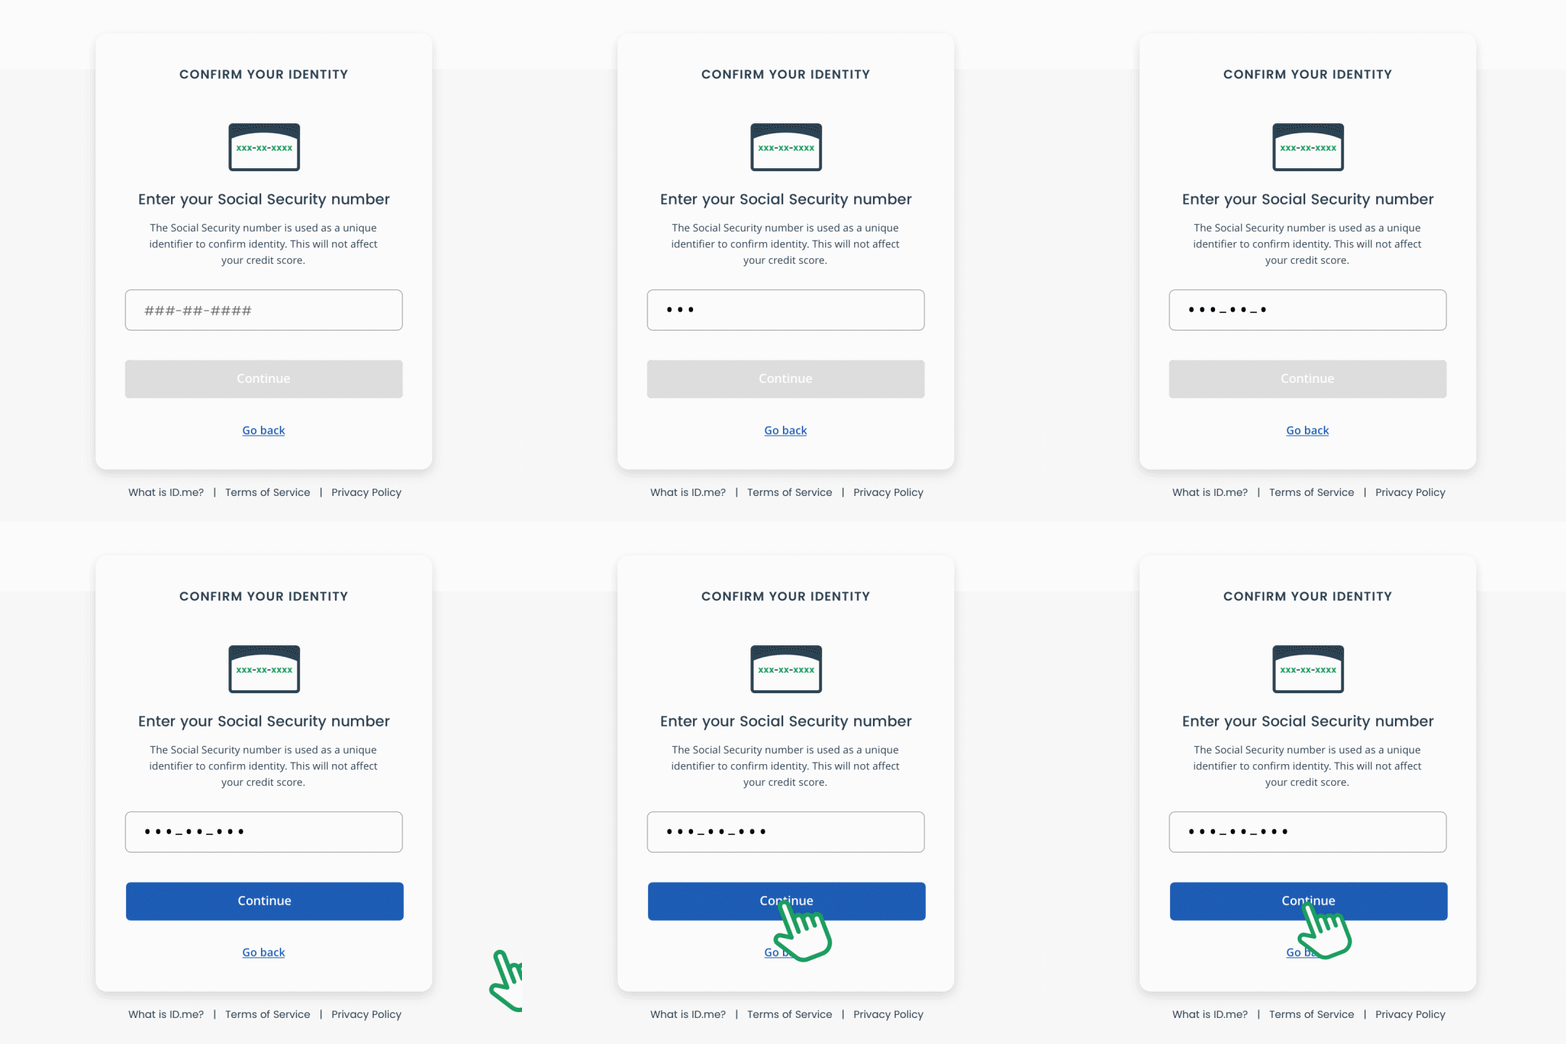
Step #8 – Review your information
If all looks good, correct, and accurate, select Allow and continue to finish the ID verification process and then head to your new IRS.gov account.
If, for some reason, you can’t verify your identity, you’ll have to get on a video call with an ID.me Trusted Referee. You’ll need to show them documents to prove that you are who you say you are. But once that’s done, you’ll have access to your IRS.gov account using that ID.me password without any issues.
Now that you have access to your IRS.gov account, you can see any notices or letters pay any tax amount owed or estimated tax amount for a future year. You can pull any transcripts or records about your account to see what the IRS has on file for you. And even authorize your accountant access to your account to review this information on your behalf.


